WordPress Multisite Setup
Installing and Setting Up a WordPress Multisite Network
To run more than one landing page from a single WordPress installation, you can configure a WordPress multisite network. WordPress is designed with the inherent capability to establish more than one website operating on the same WordPress installation. Below are the instructions for setting up and configuring a WordPress multisite network.
What is a WordPress Multisite Network?
With a WordPress multisite network, you can manage multiple WordPress sites from the same installation of WordPress.
You can establish new sites immediately and manage all of them with the same login. And, you can give other users access to sign up and create their own sites on your domain..
Server Requirements for WordPress Multisite Networks
All sites on a WordPress multisite network will share a server. Thus, the most critical requirement is excellent hosting.
You need plenty of storage and bandwidth, so get VPS hosting or a dedicated server. Shared hosting may be fine for only a couple of websites with very low traffic. BUT, you need more resources for multiple sites with higher traffic.
The server must be running Apache’s mod_rewrite module. Most hosting services provide this.
Planning a Domain Structure
You have two choices for a WordPress multisite network domain structure:
- Subdomains: http://site1.example.com
- Requires wildcard subdomains on the server. Ensure your hosting service supports wildcard subdomains; not all providers do.
- Subdirectories (or path-based URLs): http://example.com/site1/
- Requires enabling pretty permalinks for the root site. Does not require wildcard subdomains on the server.
How to Enable the WordPress Multisite Network Feature
1. Install and set up WordPress normally or use an existing WordPress site. If you use an existing site, back up your WordPress site completely before continuing.
2. To enable the multisite feature, edit your wp-config.php file:
Add this code just before the line that reads /* That’s all, stop editing! Happy blogging. */:
Note that this code just enables the multisite feature. You must still set up the multisite and configure your network.
How to Set Up the WordPress Multisite Network
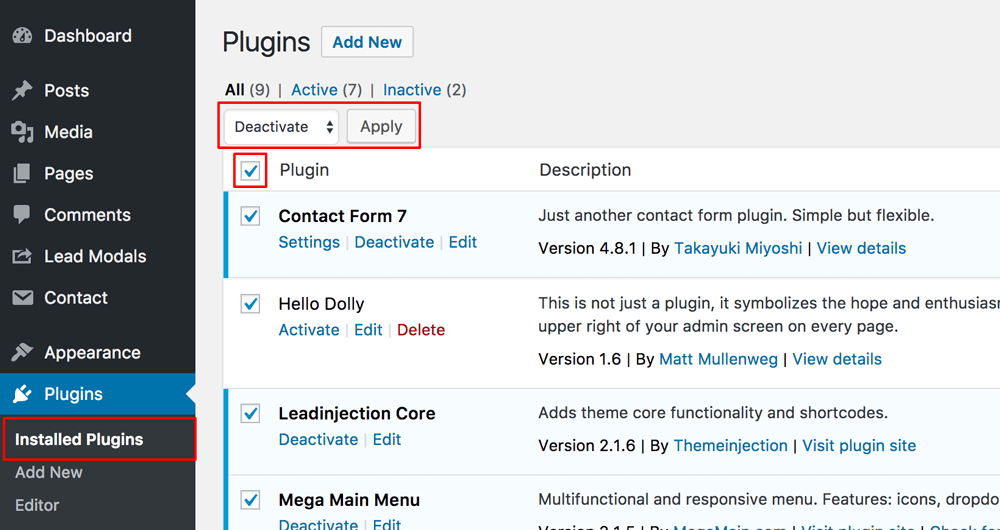
1. Deactivate all plugins on your WordPress site: Dashboard >> Plugins >> Installed Plugins Click the top checkbox to select all plugins Bulk Actions dropdown >> Deactivate >> Apply
2. Configure the multisite network: Dashboard >> Tools >> Network Setup
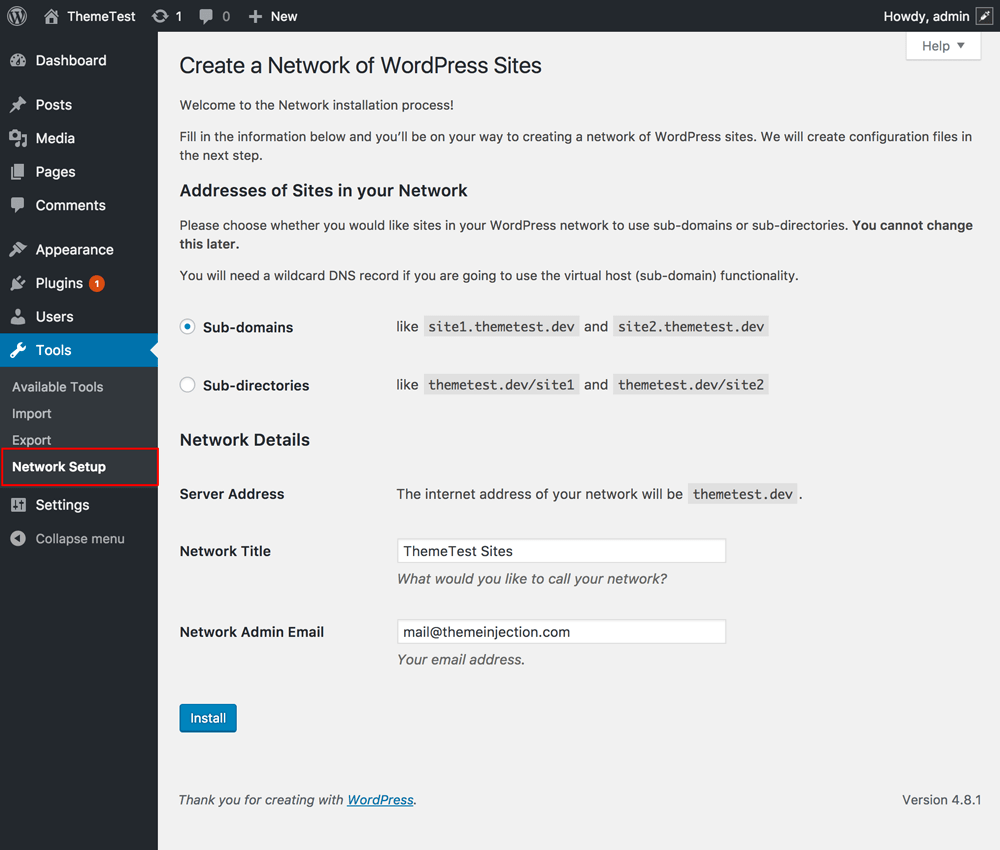
You’ll see the notice about needing Apache’s mod_rewrite module installed on your server. You should already have checked on this when choosing your hosting service.
3. Choose Subdomains or Sub-directories
4. Enter a Network title and ensure the Network Admin Email is correct
5. Click Install
6. Copy and paste the code you see on the screen into the wp-config.php and .htaccess files
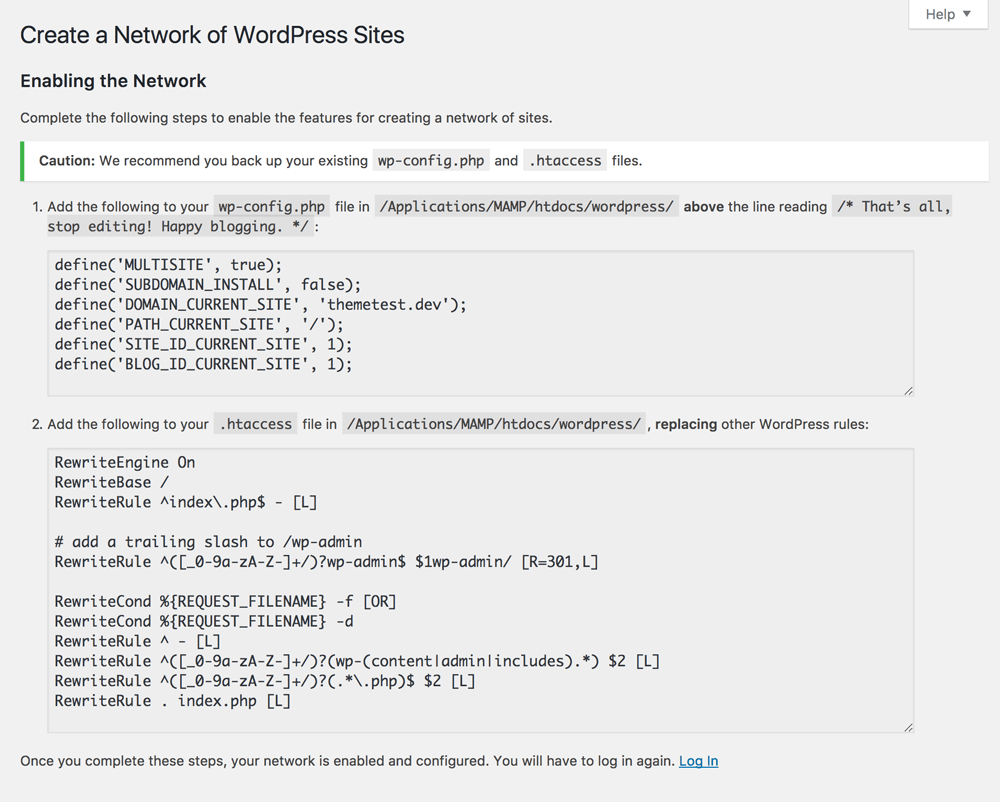
7. Log in to WordPress again
How to Configure Network Settings
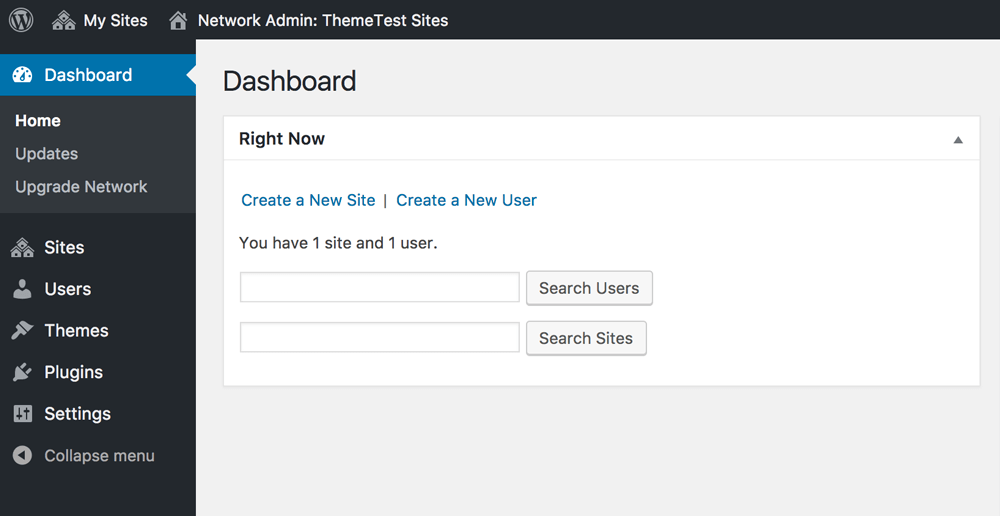
In the toolbar: My Sites >> Network Admin >> Dashboard
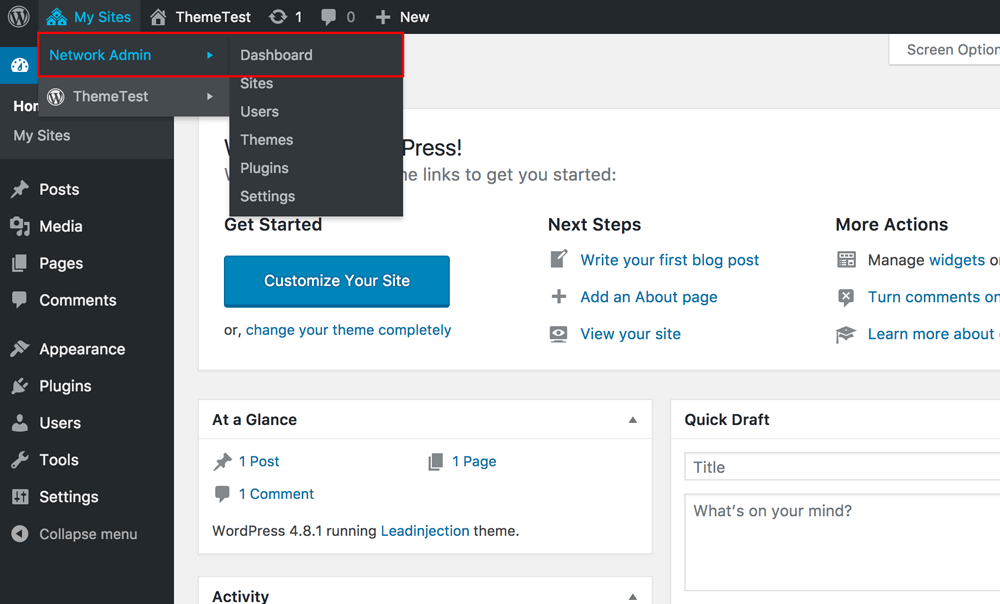
There are now new menu items for managing a multisite network and a dashboard widget for creating new sites and users.
For network settings, Admin Sidebar >> Settings
In the Operational Settings section, you’ll see the previously-configured network title and admin email.
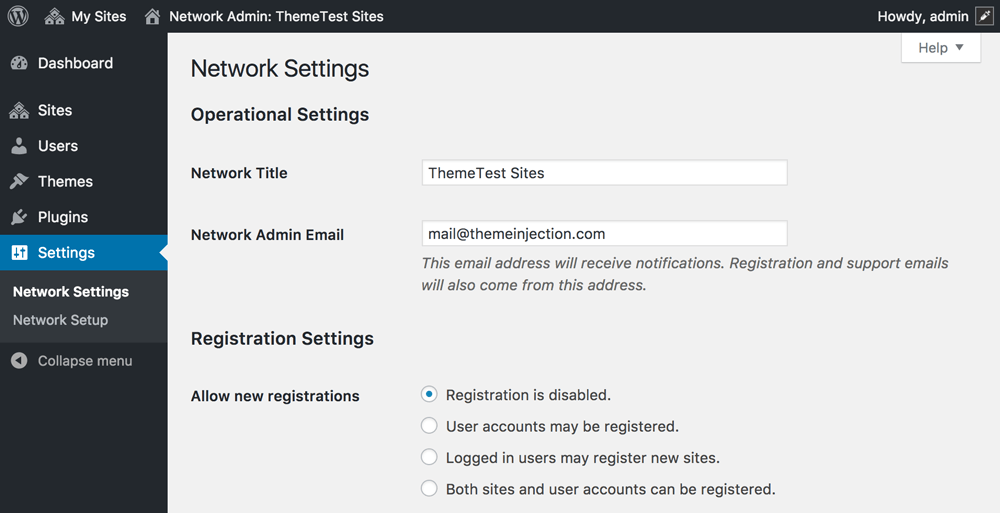
In the Registration Settings section, you can open your multisite network for registrations, which is disabled by default. This is probably the most important configuration choice for your network. If you do not enable this, no one else will be able to register or create another site on your network. There are four choices: allow user accounts to be registered, allow logged-in users to register new sites, or both.
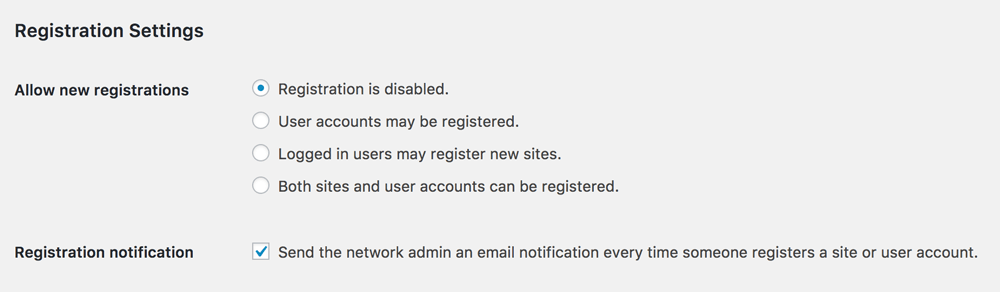
You also have the option to receive emails every time a new user or site is registered.
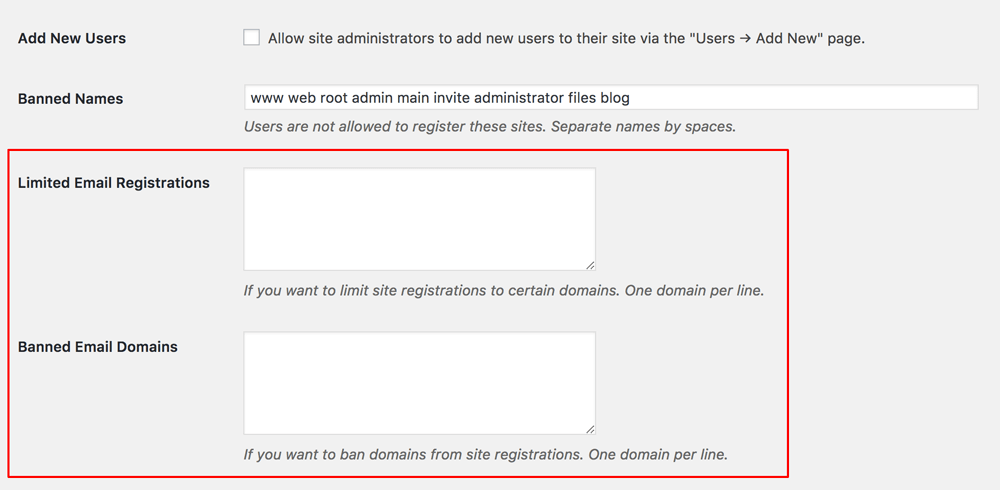
Check Add New Users if you want individual site administrators to be able to add users on their sites.

Use the Limited Email Registration field to enter specific email addresses or domains and limit who is allowed to register and create users or sites. Use the Banned Email Domains field to ban them from registering.
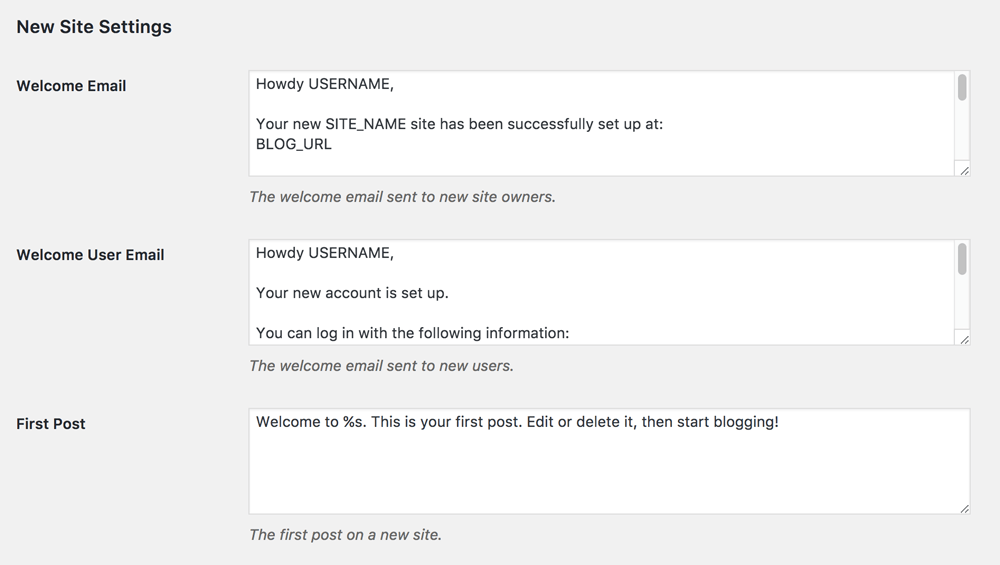
In the New Site Settings section, configure the default options for welcome emails, first default post, page and comments for new sites created on your multisite network.
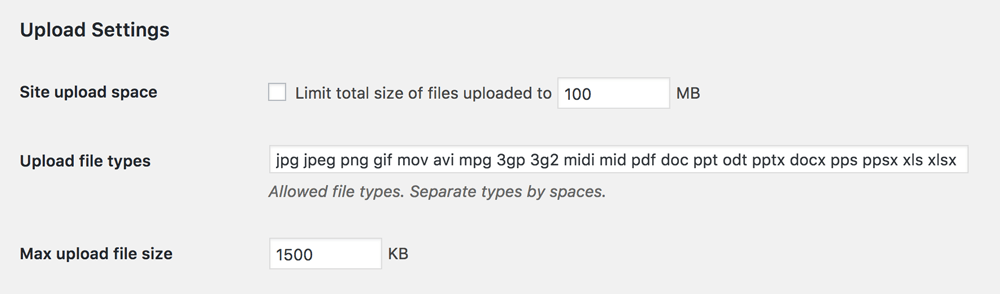
In the Upload Settings section, you can limit the total upload space for a site, which is very important in managing server resources. The default setting is 100 MB, which is at least 100 average photo uploads.
Change the allowed upload file types here, too. Defaults are images, audio, video, and pdf files. Add additional ones such as doc, docx, odt, etc., if desired. Also choose a file size limit for uploads if you like.
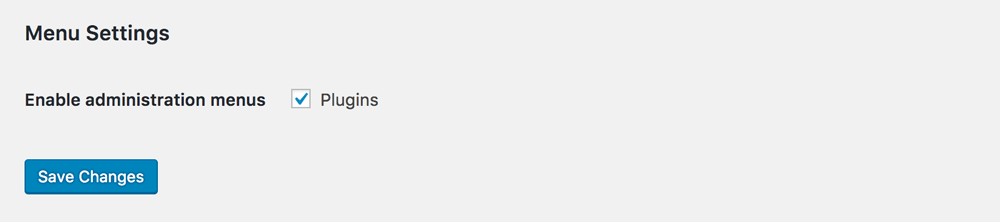
In the Menu Settings section, next to Enable administration menus, check the box next to Plugins to allow each site admin to activate/deactivate plugins on their respective sites. They won’t be able to install new plugins, however.
How to Add a New Site to Your WordPress Multisite Network
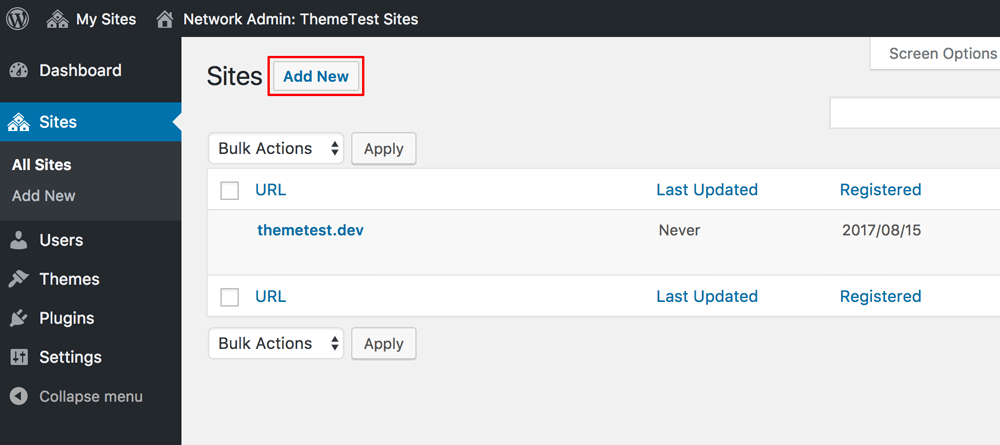
1. Select My Sites >> Network Admin >> Sites in the Admin Toolbar.
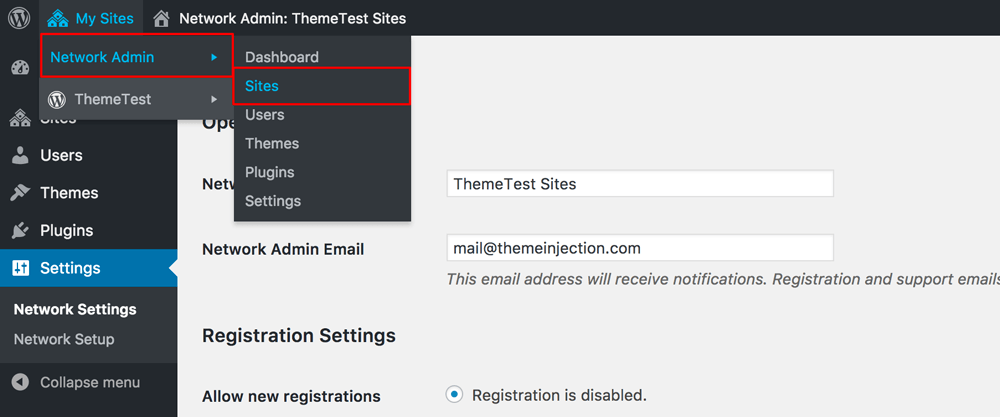
You’ll see a list of sites on your current multisite installation. Your primary site will be listed as the only site if you have no others created.
2. Click Add New
On the ‘Add New Site’ page, enter the new site’s address. You won’t type the full address, just the part you want to use as a subdomain or sub-directory.
Give a site title and add the site admin’s email address. It can be different from the one you use to manage the multisite network.
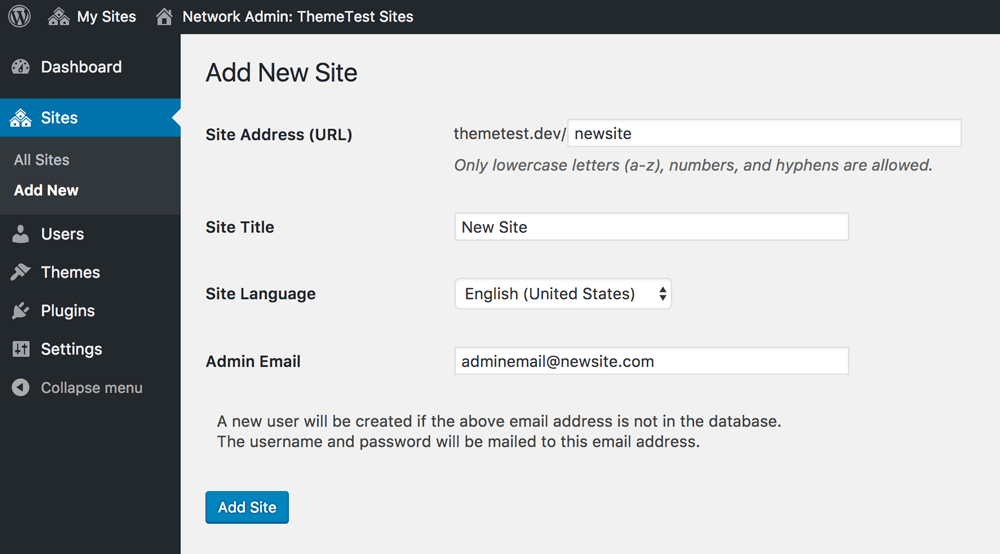
If the email address you enter is not currently being used by another user, WordPress will create a new user and send the password and username to the email address you enter.
Click Add Site
WordPress creates a new site and adds it to your multisite network. As the network admin, you will receive a new site registration email. Also, if you created a new user in Step B above, that user will receive an email with instructions to set a password and login.
How to Add the Leadinjection Theme and Plugins to Your Multisite Network
Remember that, by default, individual site administrators are not allowed to install themes and plugins. As network admin, you must install the plugins and themes and make them available to the site admins.
To add themes go to: My Sites >> Network Admin >> Themes
To add the Leadinjection theme, you need to click Add New >> Upload Theme. Locate “leadinjection.zip” where you have it stored and click Install Now.
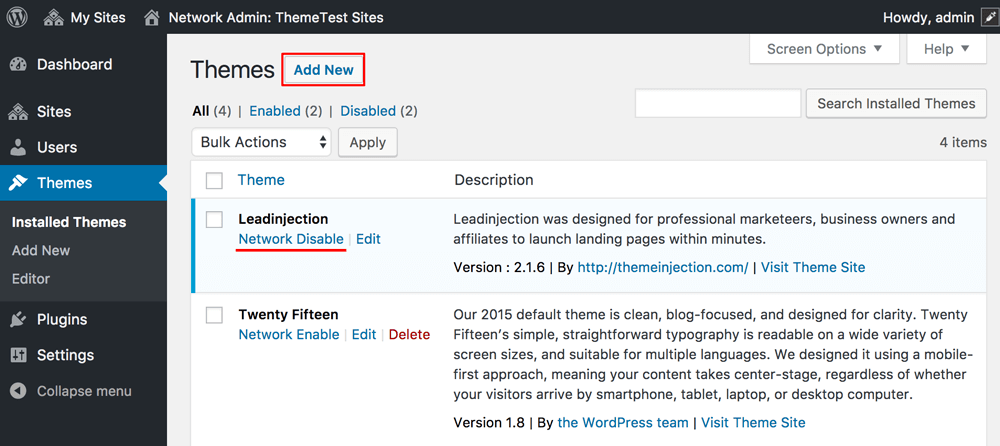
On the list of currently installed themes, click Network Enable to make it available to site admins. Conversely, click Network Disable to make it unavailable to them.
To add plugins go to: My Sites >> Network Admin >> Plugins
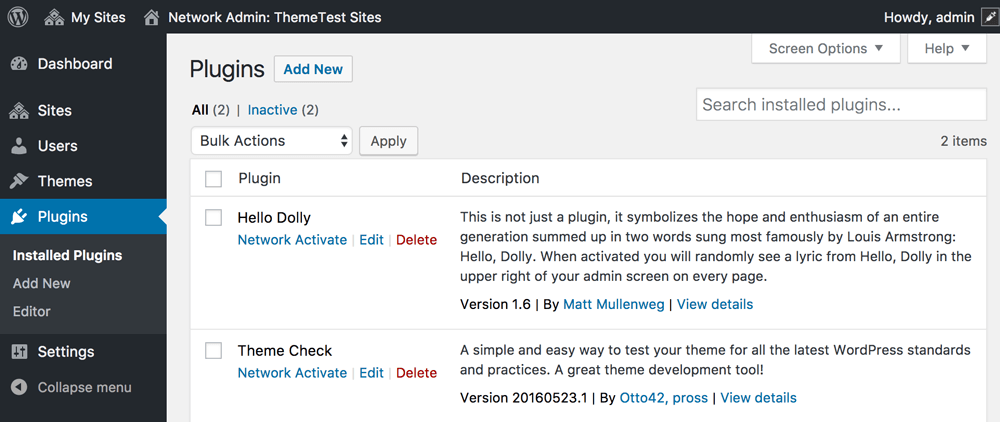
Remember that if you enabled Plugins Menu for site admins on the Network Settings page, then they are able to activate or deactivate installed plugins without your intervention.
Troubleshooting Issues in WordPress Multisite Networks
1. Probably the most common cause of issues is the incorrect configuration of wildcard subdomains. So, a first step is to make sure that your web host supports wildcard subdomains.
2. If users cannot log in to the admin area of their own sites after they add the required code to the wp-config.php file, try replacing this line in the wp-config.php file
with this line: